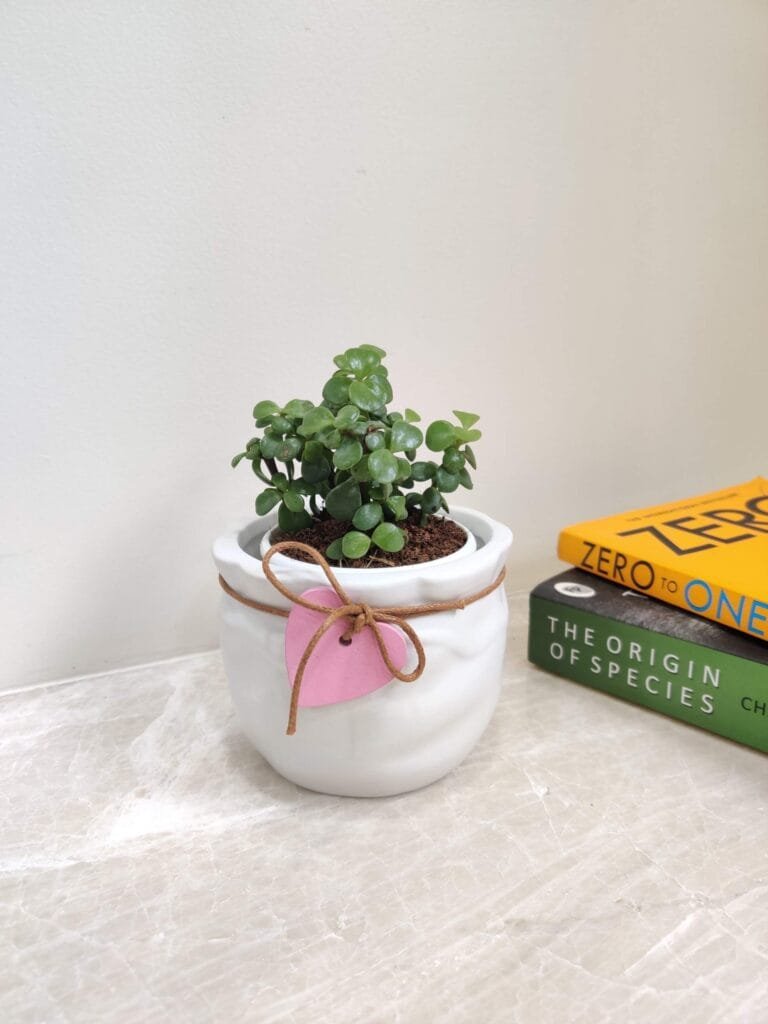
Jade plants — also known as Crassula ovata or money plants — are one of the most popular succulents for home gardens. Their thick, shiny, oval-shaped leaves and easy-going nature make them perfect for beginners. One of the coolest things about jade plants is how easily you can grow more of them — not from seeds, but from a single leaf or stem!
This blog post will take you step-by-step through three different jade plant propagation methods, especially focusing on the easiest one — propagating from a single leaf. Even if you’ve never propagated a plant before, this guide will give you everything you need to know to succeed.
What Is Propagation? A Beginner’s Introduction
Propagation is a natural and rewarding way to grow new plants from parts of an existing plant — such as a leaf, stem, or even a root segment. Think of it as nature’s recycling system: instead of buying new plants or letting broken stems go to waste, you can create a whole new jade plant from a single healthy piece!
With jade plants (Crassula ovata), propagation is especially easy and beginner-friendly. These succulents have a natural ability to regenerate, which means you can grow a completely new plant from:
- A single leaf
- A stem cutting
- Or by rooting a stem in water
This method mimics what happens in nature. In dry environments, jade leaves or stems that break off can land on soil, develop roots, and eventually grow into independent plants — given the right conditions.
Why Propagate a Jade Plant?
Propagation isn’t just a cool science experiment — it has many practical benefits. Here’s why plant lovers, gardeners, and even beginners enjoy doing it:
1. Grow New Plants from Clippings or Fallen Leaves
Sometimes, jade plant leaves naturally fall off due to movement, pruning, or age. Instead of throwing them away, you can turn them into healthy new plants. It’s a satisfying and sustainable way to garden.
Bonus: Even a leaf that fell weeks ago can still sprout roots if it’s healthy and plump!
2. Multiply Your Favorite Plants for Free
Love the look of your jade plant? Wish you had more of them? Propagation lets you clone your favorite plant — no need to buy another! Over time, you can fill your home, balcony, or garden with beautiful jade plants that all came from one “parent.”
Great for budget-conscious gardeners!
3. Share Plants with Friends and Family
Plant propagation is also a heartfelt way to connect with others. Gift a small rooted jade cutting to someone special — it’s a living present that grows over time. Whether for birthdays, housewarmings, or just because, home-propagated plants are personal, meaningful, and appreciated.
4. Save a Damaged or Overgrown Plant
Sometimes, jade plants get leggy, top-heavy, or suffer from broken stems. Instead of losing the plant entirely, you can trim and propagate the healthy parts. This not only saves the plant but also encourages fresh, compact growth in the original.
It’s like giving your jade plant a second chance — and multiplying your green success!
Is Propagation Easy?
Yes! Jade plants are among the easiest houseplants to propagate, especially for beginners. They’re hardy, forgiving, and root readily when given the right conditions — such as dry air, indirect sunlight, and well-draining soil.
Whether you’re a curious beginner, a DIY plant parent, or just want more greenery in your space, jade plant propagation is the perfect place to start.
Let’s now dive into the step-by-step methods for propagating jade plants — starting with the easiest one: using a single leaf.
When to Propagate Jade Plants
Timing matters!
Best Season:
- Spring or Summer – This is the active growing season when the plant has the most energy to develop roots and new leaves.
Avoid:
- Winter or Fall – Jade plants go into a type of dormancy during colder months. Rooting will be slower and less reliable.
Method 1: Propagating Jade Plants Using a Leaf (Best for Beginners)
This is the easiest and most satisfying method — all you need is a healthy leaf and a little patience!
What You’ll Need:
- A mature jade plant
- One or more healthy leaves
- A clean, dry surface
- Potting mix (cactus/succulent mix preferred)
- A shallow container or small pot
- Rooting hormone (optional, for better success)
Step-by-Step Guide:
1. Choose a Healthy Leaf
Look for a plump, green leaf that isn’t damaged or wrinkled. The leaf should be firm to the touch.
Tip: If a leaf has naturally fallen off and looks healthy, you can use it too!
2. Remove the Leaf
Gently twist or snap the leaf from the stem. Make sure the base (the little bump where it was attached) comes off clean — this is where roots will grow.
3. Let the Leaf Dry (Callous Over)
Place the leaf in a dry, shaded spot for 3 to 5 days. This step is very important! It allows the cut end to heal or callous, which helps prevent rotting when you plant it.
4. Apply Rooting Hormone (Optional)
Dab a small amount of rooting hormone to the cut end. This encourages faster root growth, especially helpful for beginners.
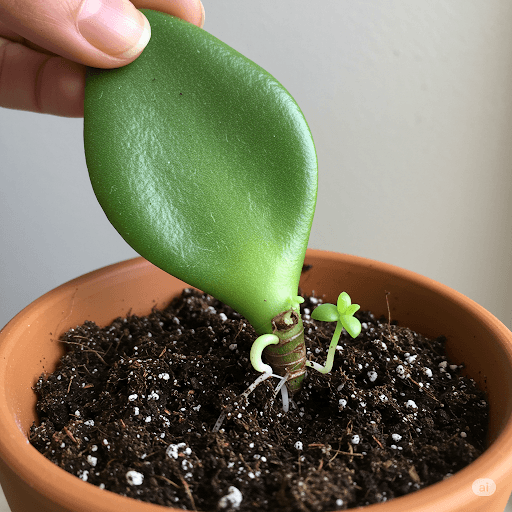
5. Place the Leaf on Soil (Do Not Bury)
Fill a small container with well-draining soil, such as a succulent or cactus mix. Gently lay the leaf flat on the surface. Do not stick it into the soil.
6. Avoid Watering Initially
Do not water the soil until you see tiny roots forming — usually within 2 to 3 weeks. Excess moisture at this stage can cause the leaf to rot.
7. Start Light Mistings
Once roots and a baby plant (a tiny rosette) start forming, mist the soil lightly every few days. Avoid soaking the soil.
8. Transplant When Ready
After about 4 to 6 weeks, the new baby jade plant should have a small root system. You can now plant it in a slightly larger pot and water lightly.
Keep the plant in bright, indirect light and let the soil dry out completely between watering’s.
Method 2: Propagating from a Stem Cutting in Soil
If you’ve pruned your jade or a branch snapped off, don’t throw it away — you can use it to grow a whole new plant!
Supplies Needed:
- Clean scissors or pruning shears
- A healthy jade branch (at least 3–4 inches long)
- A small pot
- Succulent or cactus potting mix
How to Do It:
1. Cut the Stem
Use clean, sharp scissors to cut a healthy stem just below a node (where the leaves grow out). Your cutting should be at least 3 inches long with a few leaves.
2. Remove Lower Leaves
Remove the leaves on the bottom 1–2 inches of the stem. This is the part you’ll stick in the soil.
3. Let It Dry
Allow the stem to sit in a dry place for 3 to 5 days until the cut end callouses over.
4. Plant It
Insert the stem into well-draining soil, about 1–2 inches deep. Press the soil gently around it to keep it upright.
5. Water Lightly
Water sparingly — just enough to moisten the soil. Wait until the soil is completely dry before watering again.
6. Wait for Roots
Roots usually appear in 2–4 weeks. During this time, keep the pot in a warm, bright area but out of direct sun.
Method 3: Water Propagation (Fun for Visual Learners)
Water propagation lets you see the roots grow day by day. It’s a fun method, especially for kids or new plant parents.
Supplies:
- A healthy stem cutting (3–4 inches long)
- A clear glass or jar
- Clean water
Instructions:
1. Prepare the Cutting
Trim a healthy stem and remove the lower leaves so 1–2 inches of the stem is bare.
2. Let It Dry
Let the cutting dry for 2–3 days before placing it in water. This reduces the risk of rot.
3. Place in Water
Submerge just the cut end of the stem in water. The leaves should stay dry and above the waterline.
4. Change Water Every Few Days
To prevent bacteria or algae, replace the water every 3–4 days.
5. Watch the Roots Grow!
In about 1–2 weeks, you’ll start seeing tiny white roots. Once they’re about an inch long, transfer the cutting into soil.
Bonus Tips for Beginners
- Label Your Cuttings: If you’re propagating multiple leaves or stems, label the containers with the date you started to track progress.
- Use Shallow Trays for Leaves: This helps air circulation and prevents moisture buildup.
- Avoid Direct Sunlight at First: Bright indirect light is best during the early rooting stage. Too much sun can dry or burn the cuttings.
- Sanitize Tools: Always use clean, sterilized tools to avoid spreading disease to your cuttings.
With the right care, your jade plant can thrive and even reward you with beautiful blooms, turning your green corner into a blooming masterpiece.
Final Thoughts
Propagating a jade plant from a single leaf is a magical and beginner-friendly experience. With just a little care and patience, you can multiply your jade plant collection, give them as thoughtful gifts, or enjoy the satisfaction of growing a new plant from scratch.
Whether you’re starting with a fallen leaf or a small stem cutting, jade propagation is a great way to connect with your plants and learn about their life cycle. Try it — your future self (and your plant shelf) will thank you!
FAQs
Q: Can I use any leaf to propagate a jade plant?
Only use healthy, mature leaves. Damaged or young leaves may not root properly.
Q: Why is my leaf shriveling instead of rooting?
This could be due to too much sun, water, or a damaged base. Make sure the leaf calloused before planting and is not being overwatered.
Q: Can I use regular potting soil?
Regular soil holds too much water and can cause root rot. Always use succulent or cactus mix, or mix potting soil with sand and perlite for better drainage.
Q: How long does it take to grow a full plant from a leaf?
It may take 2–4 months for a baby jade plant to grow to a size where you can transplant it into its own pot. Patience is key!
Explore our curated collection of jade plant essentials — from well-draining soil to stylish planters. [Shop Now]