


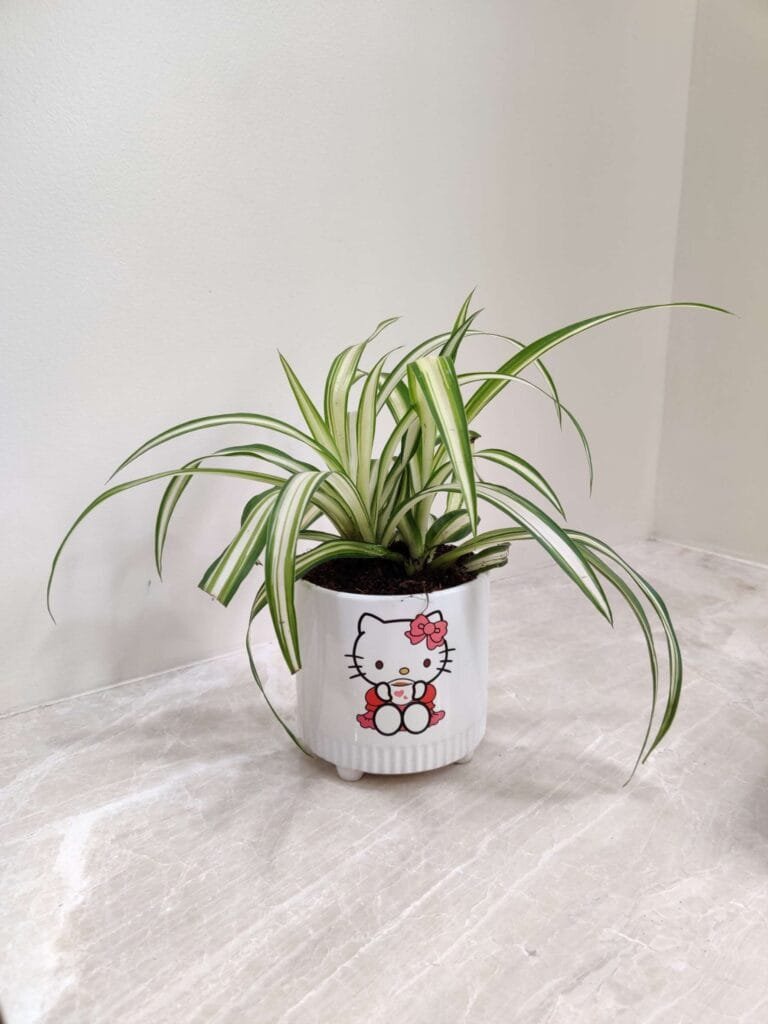
Looking for the best low-maintenance indoor plant to brighten your home or office? Meet the spider plant (Chlorophytum comosum)—one of the most resilient and air-purifying houseplants you can grow. With its cascading leaves, easy propagation, and minimal care needs, the spider plant is perfect for beginners and experienced gardeners alike.
Whether you’re searching for a non-toxic houseplant for pets, an easy indoor plant for low light, or indoor plants that clean the air, this comprehensive guide has everything you need to successfully grow and care for spider plants indoors.
Why Spider Plants Are the Best Indoor Houseplants for Beginners
Spider plants are loved by many because they are:
- Among the best indoor plants for air purification
- Known as a low-light tolerant indoor plant
- Perfect as a pet-friendly houseplant
- Great for use in hanging plant baskets for home décor
- One of the easiest indoor plants to propagate
Their ability to thrive on minimal attention makes them one of the top choices for anyone looking to buy hard-to-kill houseplants or maintain indoor greenery with low effort.
Origin and Botanical Background of the Spider Plant
The spider plant’s origin traces back to Southern Africa, where it grows in tropical and subtropical forests. It’s part of the Asparagaceae family and is botanically known as Chlorophytum comosum. Due to its resilience and adaptability, it’s now one of the most common tropical houseplants grown indoors around the world.
Spider Plant Varieties to Decorate Your Home
Here are popular indoor spider plant varieties for decorating different spaces:
- Chlorophytum comosum ‘Vittatum’ – With white-striped leaves, this is a classic favorite for modern homes.
- Chlorophytum comosum ‘Variegatum’ – Featuring white-edged, green-centered leaves, great for contrast in your indoor garden.
- ‘Bonnie’ Spider Plant – A curly-leafed version perfect for compact spaces.
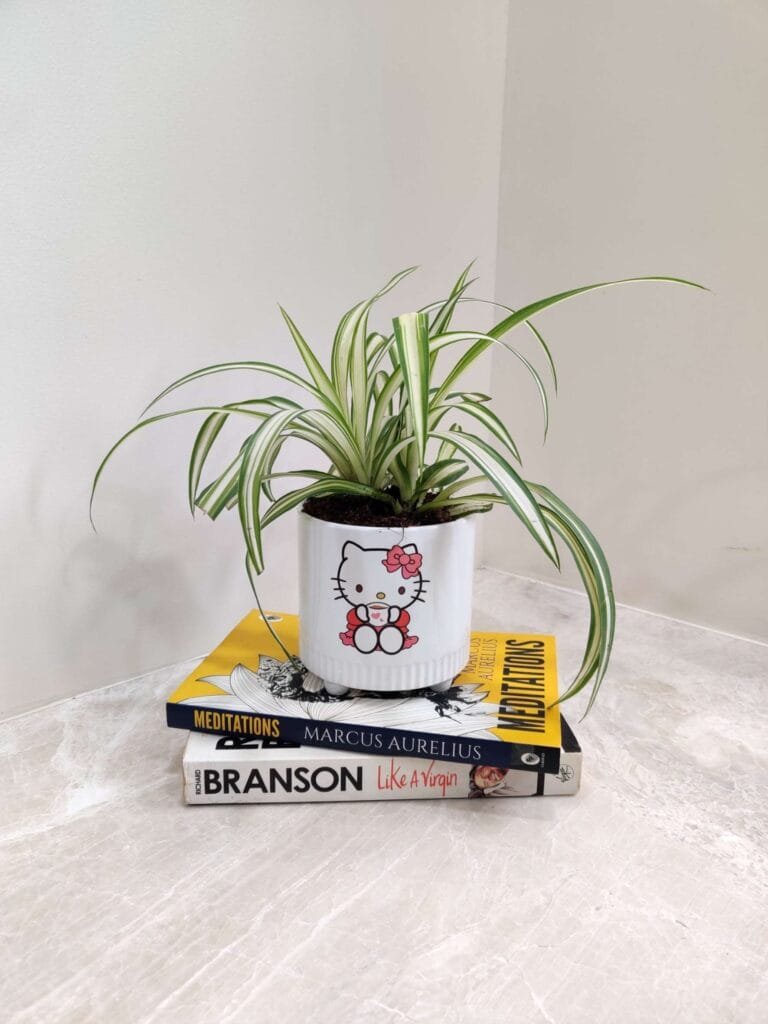
These decorative indoor plant types look amazing in boho planters, ceramic pots, or modern hanging planters.
1. How to Plant Spider Plants Indoors
Best Soil for Spider Plants Indoors
For optimal growth, use a well-draining houseplant soil mix. Ideal ingredients include:
- 2 parts organic potting mix
- 1 part perlite or pumice
- 1 part coconut coir or peat moss
This combo promotes root aeration and prevents overwatering—critical for spider plant care indoors.
Best Pot for Spider Plants
Choose:
- A pot with drainage holes
- A hanging basket for aesthetic display
- A compact container to encourage root-bound growth (which triggers pup production)
Spider plants prefer to be slightly root-bound, so avoid overpotting.
2. Spider Plant Light Requirements
For best growth, place your spider plant in:
- Bright, indirect light (ideal for apartments and offices)
- Near east or west-facing windows
- A few hours of gentle morning sunlight
Avoid:
- Harsh, direct afternoon sun (can scorch leaves)
- Deep shade (slows growth and prevents spiderette production)
Spider plants are among the best indoor plants for indirect sunlight, making them perfect for indoor plant shelves and low-light corners.
3. Watering Tips for Spider Plants
How Often to Water
- Water when the top 1–2 inches of soil feels dry
- Typically once a week in warmer months
- Reduce watering in colder months
What Kind of Water to Use
- Use distilled, filtered, or rainwater
- Avoid hard tap water (can cause brown leaf tips due to fluoride and chlorine)
Spider plants are popular in low-maintenance plant care routines because they tolerate occasional missed watering, making them ideal for busy plant owners.
4. Temperature and Humidity for Healthy Spider Plants
Spider plants grow best in:
- 60–80°F (15–27°C) indoor temperature range
- Medium to high humidity (over 40%)
Spider plants are a great choice for:
Winter indoor plants, as long as they’re kept away from cold drafts
Tropical houseplant collections
Indoor plants for the bathroom, where humidity is naturally high
Brown tips on spider plant leaves are usually caused by low humidity, fluoride in tap water, or over-fertilization. To prevent this, learn how to fix it and keep your plant thriving.
5.Fertilizing Your Spider Plant
When to Fertilize
- Every 4–6 weeks during spring and summer
- Avoid fertilizing in fall and winter
What to Use
- Use a balanced, water-soluble fertilizer (10-10-10 or 20-20-20)
- Apply at half strength to avoid fertilizer burn
Spider plants thrive when fertilized lightly, making them a top pick for low-fertilizer houseplants.
How to Propagate Spider Plants at Home
If you’re looking for easy indoor plants to propagate, the spider plant (Chlorophytum comosum) tops the list. Propagation is one of the most rewarding aspects of spider plant care. With the right technique, you can quickly multiply your collection and even gift plants to friends and family.
Below are three proven methods for spider plant propagation indoors:
Method 1: Propagating Spider Plants from Spiderettes (Pups)
Spiderettes, also called pups or plantlets, are tiny versions of the parent plant that grow on long stems. This is the easiest and most common way to propagate spider plants at home, and it’s perfect for beginners.
Step-by-Step Instructions:
- Wait for Root Development
Allow the spiderette to grow until it forms visible roots (1–2 inches long). This ensures a higher success rate when transplanting. - Cut the Pup from the Mother Plant
Use clean, sharp scissors or pruning shears to carefully detach the spiderette from the stem. - Place in Water or Soil
- For water propagation: Place the pup in a glass jar with clean water. Change the water every 3–4 days.
- For soil propagation: Plant directly into a small pot with a well-draining houseplant mix.
- Keep Moist and Warm
- Maintain moderate humidity and indirect sunlight.
- Keep the soil lightly moist (not soggy) during the rooting phase.
- Watch for New Growth
In 2–4 weeks, you’ll see new leaves and root expansion—a sign of successful propagation.
Method 2: Propagation by Root Division
This method is great for mature, overcrowded spider plants or when you’re already repotting your plant.
When to Use Division:
- The spider plant is root-bound.
- You want to create several full-sized plants instantly.
- You’re looking for a fast spider plant propagation technique.
How to Divide a Spider Plant:
- Remove the plant from its pot and gently shake off excess soil.
- Identify natural divisions in the root system with their own leaves.
- Use your hands or a clean, sharp knife to separate the sections.
- Replant each section in fresh well-aerated potting mix for indoor plants.
- Water thoroughly and place in a bright, indirect light location.
Method 3: Seed Propagation (Advanced)
While less common, spider plants can also be propagated from seeds. This is ideal for hobbyists or those looking to try something new.
How to Grow Spider Plants from Seeds:
- Let flowers on the spider plant mature and produce seed pods.
- Collect the black seeds once the pods dry and crack open.
- Plant seeds ½ inch deep in a seed-starting mix in a tray or small pots.
- Keep the soil moist and place in a warm area with indirect light.
- Germination may take 2–3 weeks.
When and How to Repot a Spider Plant
Spider plants are fast-growing houseplants, and while they love being slightly root-bound, there comes a point when repotting becomes necessary.
When to Repot a Spider Plant
Repot your spider plant every 2 to 3 years, or sooner if you notice these signs:
- Roots are growing out of the drainage holes
- Soil dries out rapidly after watering
- Growth has slowed or stopped
- Leaves look limp or discolored despite proper care
These are common symptoms of a root-bound houseplant, meaning the roots have outgrown their pot and need more space.
How to Repot a Spider Plant (Step-by-Step)
- Choose the Right Pot
- Use a container that’s only 1–2 inches wider than the current one.
- Ensure the pot has good drainage holes to avoid root rot.
- Prepare the Soil Mix
Use a lightweight, well-draining potting mix. You can mix:- 2 parts organic potting soil
- 1 part perlite or coarse sand
- 1 part coconut coir or peat moss
- Gently Remove and Tease the Roots
- Loosen the root ball gently.
- Trim away any dead or mushy roots.
- Replant and Water Thoroughly
- Center the plant and fill in with fresh soil.
- Water well and place in a bright, indirect light location.
- Skip Fertilizer for 3–4 Weeks
Let the plant settle before resuming your fertilizing schedule.
This guide is perfect for users searching for “how to repot a spider plant with root-bound issues,” “when to move indoor plants to bigger pots,” or “best soil mix for spider plants.”
Common Spider Plant Problems (and Fixes)
| Issue | Cause | Solution |
|---|---|---|
| Brown tips | Fluoride or over-fertilization | Use distilled water, cut back on fertilizer |
| Yellow leaves | Overwatering | Let soil dry out, ensure proper drainage |
| No pups | Low light or no stress | Move to brighter spot, let plant become root-bound |
| Pests (aphids, mites) | Dry air, open windows | Isolate and treat with neem oil or insecticidal soap |
These are some of the most common houseplant care problems, and spider plants usually bounce back quickly when issues are addressed.
Styling Tips: Best Places to Use Spider Plants Indoors
Spider plants make stunning focal points for:
- Living room hanging planters
- Kitchen countertops or floating shelves
- Bathroom windows for a spa-like vibe
- Office desks for a touch of green
Their lush, trailing nature makes them perfect as a statement indoor plant for small spaces or additions to your home office plant setup.
Where to Buy Spider Plants Online and Locally
You can find spider plants for sale at:
- Online plant nurseries
- Garden centers and home improvement stores
- Etsy, Amazon, and other eCommerce platforms
- Local plant markets or botanical events
When buying online, search for:
- “Buy spider plant online India” (or region-specific queries)
- “Pet-safe indoor plants delivered”
- “Best plants for home with low light”
Final Thoughts: Add Spider Plants to Your Indoor Jungle
Whether you’re looking to buy indoor plants online, create a pet-friendly indoor garden, or simply add a pop of greenery to your shelf, spider plants are a top choice. Easy to care for, fast to propagate, and visually appealing, these versatile houseplants check all the boxes.
So go ahead—grab a spider plant for your indoor garden, place it by your window, and watch it flourish into a cascading masterpiece of nature.
FAQs
1. What are the benefits of growing a spider plant?
Easy to care for, pet-safe, air-purifying, adaptable to hanging baskets, and produces plantlets for easy propagation.
2. What are the ideal growing conditions?
Thrives in light shade, well-draining loamy soil, warm temperatures (above 50°F), and 50-60% humidity.
3. How often should I water my spider plant?
Keep soil lightly moist; avoid overwatering. Use rainwater or distilled water to prevent leaf browning.
4. How do I propagate a spider plant?
Snip plantlets with roots and pot them, or place rootless plantlets on soil until they develop roots. Mature plants can also be divided.
5. What causes brown leaf tips, and how do I fix them?
Caused by fluoride in tap water, low humidity, over-fertilization, or too much direct sunlight. Use distilled water, adjust fertilizer, and maintain humidity.
6. How often should I fertilize?
Once a month in spring and summer; avoid over-fertilizing to prevent brown tips. Skip fertilizing in winter.
7. What pests affect spider plants, and how to control them?
Aphids, whiteflies, and spider mites. Rinse with water or use neem


2 thoughts on “Buy Spider Plants : Essential Care & Growth Tips for Beginners”
Add the elegance of lush, air-purifying Spider Plants to your space!
Shop now at Sanjay Nursery – Wholesale. Call/WhatsApp 9225337601 to order today!
To shop in retail, check our Spider Plants here.
thank you for making this article very useful and keep up the good work