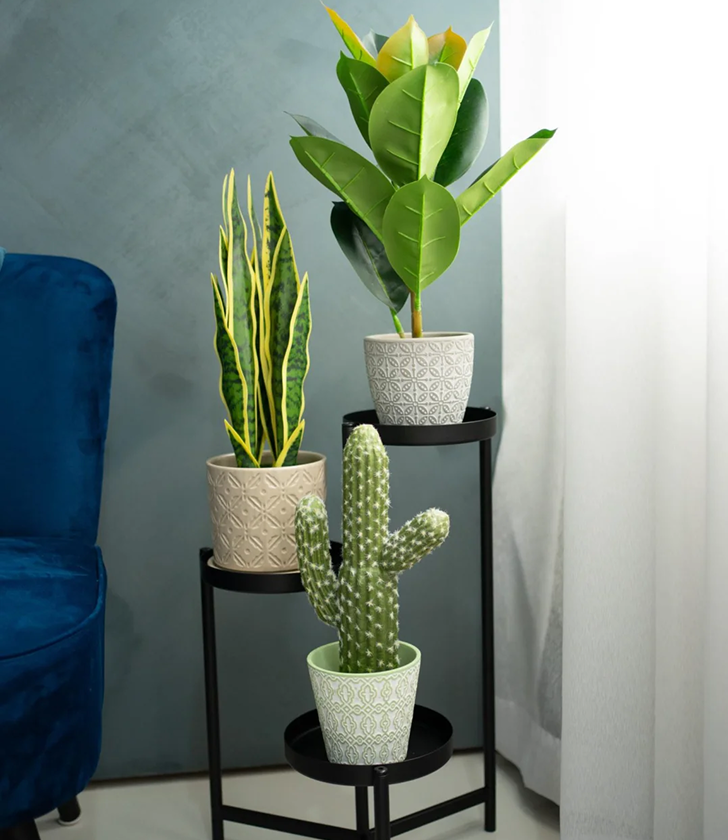

Are you looking to grow your indoor plant family without buying new ones? Propagating your own houseplants is a fulfilling and cost-effective way to do just that — and ZZ plants (Zamioculcas zamiifolia) are one of the best candidates for this. These hardy, low-maintenance indoor plants are ideal for beginners, and propagation is surprisingly easy if you know the right techniques.
One of the easiest and most rewarding ways to do this is by propagating your existing houseplants. And if you’re a fan of low-maintenance indoor plants, the ZZ plant (short for Zamioculcas zamiifolia) is the perfect place to start.
In this step-by-step guide, we’ll teach you how to propagate ZZ plants using three beginner-friendly methods:
- Stem cuttings
- Leaf cuttings
- Division of the root clump
These techniques are easy to learn, require very little equipment, and will help you grow healthy new ZZ plants from the one you already have. Whether you want to expand your indoor plant collection or gift a rooted cutting to a friend, this guide is for you.
Why Choose the ZZ Plant for Propagation?
When it comes to indoor plant propagation for beginners, ZZ plants are one of the best houseplants to start with. Here’s why:
Resilient and Beginner-Friendly
ZZ plants are extremely tough. They’re drought-tolerant, low-maintenance, and can survive in low-light environments, making them perfect for offices, bedrooms, or homes with limited sunlight. Even if you’ve never owned a houseplant before, ZZ plants are hard to mess up!
Slow Growth = High Value
One reason ZZ plants can be a bit pricey in garden centers is because they grow slowly. That makes buying multiple plants expensive — but you can propagate ZZ plants at home with just a little patience and save a lot of money.
Air-Purifying Houseplant
Not only are ZZ plants stylish and modern with their waxy green leaves, they’re also known to help purify indoor air. Having more of them in your home is a win-win for aesthetics and health.
Simple to Multiply at Home
You don’t need a greenhouse or fancy gardening tools to start your propagation journey. Propagating ZZ plants is easy, even in a small apartment. With some clean scissors, a pot, and proper indoor potting soil, you’re ready to go.
When Is the Best Time to Propagate ZZ Plants?
Timing plays an important role in the success of your ZZ plant propagation. These houseplants can technically be propagated any time of year, but for the best results, you’ll want to aim for:
Spring and Summer — The Growing Season
Like most houseplants, ZZ plants are more active during the warmer, sunnier months. In spring and summer, they’re in their natural growing cycle, which means their internal energy is focused on producing new leaves, stems, and roots. This makes spring and summer the best time to propagate ZZ plants, especially if you’re trying stem or leaf cuttings.
Tip: If you’re starting your plant propagation journey, always align your first attempt with the plant’s active season for higher success rates.
Can You Propagate ZZ Plants in Winter?
Yes, but it may take longer. During the colder months, indoor plants grow more slowly or even go dormant. If you’re propagating ZZ plants in fall or winter, don’t be surprised if it takes twice as long to see roots or new shoots. Still, with enough light and warmth indoors, you can do it year-round — just be extra patient.
Quick Checklist: Signs Your ZZ Plant Is Ready for Propagation
Not sure if your plant is ready to be divided or snipped? Look for these signs before you start:
- The plant is healthy and mature (no signs of rot or pests)
- There are multiple stems coming from the base (important for division)
- Some leaves or stems look long enough to cut without hurting the mother plant
- You’re not currently treating it for overwatering or root issues
Beginner Tip: If your ZZ plant is recovering from stress or recently repotted, wait a few weeks before propagating. A healthy, stable plant is always easier to propagate.
Tools and Materials You’ll Need
No matter which propagation method you choose, here’s a basic list of what you’ll need:
For all methods:
- Pruning shears or sharp scissors (sterilized)
- Well-draining indoor potting mix
- Plastic or terracotta pots (with drainage holes)
- Bright, indirect light
- Clean water
Additional supplies (based on method):
- Glass jar or container (for water propagation)
- Shallow tray or pot (for leaf propagation)
- Gloves (optional for handling roots during division)
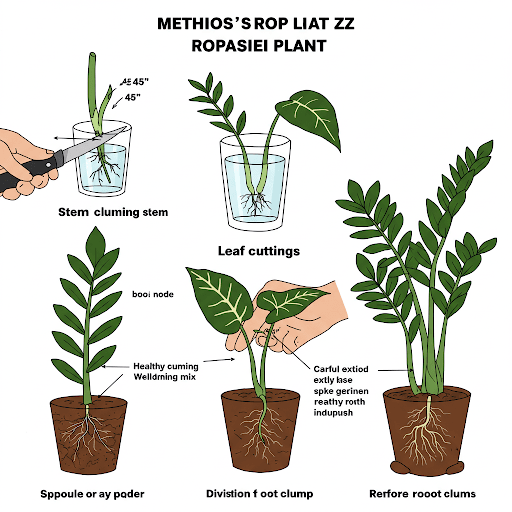
Method 1: How to Propagate ZZ Plants with Stem Cuttings
Best for: Beginners, medium to large plants
This is one of the most common ways to propagate ZZ plants, and it’s great for most houseplant enthusiasts. Stem cuttings are relatively reliable, easy to monitor, and make an ideal DIY plant propagation project.
Step-by-Step Instructions:
- Take a Healthy Cutting
Choose a healthy, mature stem from your ZZ plant. Use sterilized scissors to snip it close to the base. Each cutting should be around 4–6 inches long and include at least 2–3 leaves. - Place the Stem in Water
Put the cutting in a small glass container filled with water, submerging the bottom 1–2 inches. Avoid letting leaves touch the water to prevent rot. - Provide the Right Environment
Place the glass on a windowsill or table with bright, indirect sunlight. Change the water every 1–2 weeks to keep it fresh and clean. - Wait for Rhizomes and Roots
Patience is key here! It can take 2–4 months for ZZ plant cuttings to grow rhizomes (potato-like bulbs) and visible roots. - Pot the New Plant
Once the roots are an inch long, transfer the cutting into a pot with well-draining soil. Water it thoroughly, then let the soil dry out between waterings.
Method 2: How to Propagate ZZ Plants with Leaf Cuttings
Best for: Smaller plants with fewer stems
If you don’t want to remove a full stem from your ZZ plant, leaf cuttings are a great alternative. However, this method does take longer and has a slightly lower success rate, so patience is essential.
Step-by-Step Instructions:
- Cut Healthy Leaves
Select a few healthy leaves and snip them near the base of the stalk. Aim to take 3–5 cuttings to improve your chances. - Plant the Leaves in Soil
Fill a shallow container with a well-draining potting mix. Insert each leaf base-first into the soil, just deep enough so they stand upright. - Water and Wait
Keep the soil slightly moist (not soggy) and place the pot in bright, indirect light. A warm windowsill works well. - Watch for Growth
Over the next 3–4 months, tiny rhizomes should begin to form at the base of each leaf. Eventually, you’ll see new shoots emerge — a sign that your baby ZZ plant is growing!
Method 3: How to Propagate ZZ Plants by Division
Best for: Mature, well-established ZZ plants
Division is by far the fastest and most effective propagation method, but it does require a large plant with multiple rhizomes.
Step-by-Step Instructions:
- Remove the Plant from Its Pot
Carefully lift the entire ZZ plant from its pot. Loosen the root ball gently with your hands. - Separate the Rhizomes
Identify natural separation points where the plant has formed distinct clusters of stems and rhizomes. Using clean shears or your hands, divide the plant into sections. Each section should have at least one stem and one rhizome. - Repot Immediately
Place each divided section into its own pot filled with fresh, well-draining soil. Water thoroughly and allow to drain completely. - Provide Light and Care
Keep the newly potted divisions in indirect sunlight and follow regular ZZ plant care — water only when the soil dries out.
Tips for Successful ZZ Plant Propagation (Beginner-Friendly Guide)
If you’re new to propagating houseplants, especially ZZ plants (Zamioculcas zamiifolia), these pro tips will help you increase your success rate and avoid common pitfalls. ZZ plant propagation can be slow, but with the right care and attention, you’ll be well on your way to growing healthy new plants.
1. Always Use Sterilized Tools to Prevent Disease
Before making any cuts, make sure your scissors, pruning shears, or knives are sterilized. Dirty tools can spread harmful bacteria, fungi, or viruses from one plant to another — and that’s the fastest way to sabotage your propagation efforts.
How to sterilize your tools:
- Wipe blades with rubbing alcohol (isopropyl)
- Rinse with boiling water and dry
- Use a bleach-water solution (1 part bleach to 9 parts water) and let dry completely
2. Start Multiple Cuttings at Once to Boost Your Success Rate
When using leaf or stem cuttings to propagate a ZZ plant, it’s wise to take more than just one cutting. Not every cutting will root — that’s just nature! By starting 3 to 5 cuttings at a time, you dramatically increase your odds of getting at least one strong, healthy new plant.
Why it works:
- Some cuttings may rot or fail to root
- Growth speed varies, so you’ll have options
- You can later gift or repot the extra plants
Pro Tip: Use separate labels or pots for each batch of cuttings to track progress and prevent confusion.
3. Avoid Overwatering — ZZ Plants Like Their Soil on the Drier Side
ZZ plants are native to dry, tropical regions and have rhizomes (like bulbs) that store water. This makes them highly drought-tolerant, but also prone to root rot if overwatered — especially when propagating.
Best watering practices:
- Let the soil dry out completely between waterings
- Use well-draining potting soil with added perlite or sand
- Avoid letting water pool at the bottom of the pot (use pots with drainage holes)
- For water propagation, change the water every 1–2 weeks to avoid stagnation
Avoid This Mistake: Don’t water on a schedule — water based on soil dryness. Wet soil + low light = perfect conditions for rot.
4. Label Your Cuttings to Track Progress and Propagation Dates
When working with multiple cuttings — especially over several months — it’s easy to lose track of when you started each one. Use plant tags or masking tape to write the date and type of propagation (stem, leaf, or division).
Benefits of labeling:
- Helps track growth timeframes
- Makes it easier to compare methods
- Reminds you when it might be time to repot or check for roots
Tip for Beginners: Keep a simple indoor plant care journal or use a notes app to log progress, watering habits, and lighting conditions.
5. Be Patient — ZZ Plants Are Slow to Grow But Worth the Wait
This is the most important tip of all. ZZ plant propagation takes time — usually between 3 to 6 months to see noticeable root or shoot development. That’s completely normal!
Unlike fast-rooting plants like pothos or philodendrons, ZZ plants focus on building rhizomes first, which are like internal water tanks. Once those are formed, roots and shoots follow.
What to expect:
- No visible change for the first 1–2 months
- Small root nubs or rhizome bumps between months 2–4
- New leaf shoots by month 5–6
Stay Encouraged: Just because you can’t see growth doesn’t mean nothing’s happening. Under the soil or water surface, your ZZ cutting is working hard!
Indoor Plant Propagation: The Joy of Growing Your Own Houseplants
One of the greatest joys of indoor gardening is the ability to multiply your collection through propagation. Not only does it save money, but it also deepens your connection to your houseplants. Watching a tiny leaf turn into a full plant is nothing short of magical.
Plus, propagating indoor plants like ZZ plants gives you perfect plant gifts for friends or coworkers. All you need is a little patience and a few supplies — no green thumb required.
Final Thoughts
Propagating ZZ plants is one of the most rewarding ways to expand your indoor plant family. With three simple methods — stem cuttings, leaf cuttings, and division — you can turn one ZZ plant into many, even if you’re new to houseplants.
Whether you’re nurturing cuttings in water or repotting divisions from a mature plant, each method offers a unique opportunity to observe nature at work. Start your propagation project today and watch your houseplant haven flourish, one rhizome at a time.
If you’re looking for high-quality pots, soil, or indoor plant supplies, check out our plant care essentials to give your ZZ cuttings the best start.
FAQs
How long does it take to propagate ZZ plants?
Depending on the method, propagation can take anywhere from 2 to 6 months. Leaf and stem cuttings take the longest, while division shows immediate results.
Can I propagate ZZ plants in winter?
Yes, but growth will be slower. Propagation is most successful during the spring and summer growing season.
Do ZZ plant cuttings need sunlight?
Yes, but avoid direct sun. Place your cuttings in bright, indirect light for best results.
Should I use rooting hormone for ZZ plant propagation?
It’s not required. ZZ plants naturally grow rhizomes, and using a rooting hormone doesn’t significantly speed up the process.
Why is my ZZ plant cutting not growing?
Be patient — it can take months. Ensure you’re using well-draining soil, avoiding overwatering, and keeping it in bright indirect light.

Ready to grow your own lush indoor jungle? Start propagating your ZZ plant today with the right tools and a little patience!