Orchids, especially Phalaenopsis Orchids (also called Moth Orchids), are admired for their stunning beauty and elegant form. These low-maintenance houseplants can bloom for months, making them a favorite for indoor gardeners.
But the big question many orchid owners face is: What do I do once all the blooms fall off?
The plant still looks healthy, but the flowers are gone. Should you throw it out, cut something, or just wait?
In this guide, we’ll walk you through four proven methods to care for your orchid after it flowers. You’ll also learn how to encourage reblooming and help your plant thrive for years.
Why Post-Bloom Orchid Care Matters (Quick Summary)
Post-bloom orchid care is essential for maintaining plant health, promoting reblooming, and extending the life of your indoor orchid.
Key Reasons:
- Promotes Recovery: Reduces stress and allows the plant to regain energy after blooming.
- Encourages New Growth: Stimulates fresh leaves, roots, and flower spikes.
- Prevents Disease: Trimming old spikes and checking for pests protects your orchid.
- Supports Root Health: Repotting ensures healthy root development for better nutrient absorption.
What Happens If Ignored:
- Weak growth
- Poor blooming
- Increased risk of disease
- Shorter plant lifespan
Best Practices:
- Cut the spike (above a node or at the base)
- Adjust watering and pause fertilizing during rest
- Repot if needed
- Maintain bright indirect light, moderate humidity, and stable temperature
Proper post-bloom care = healthier orchids + more flowers in the future.
Four Proven Options for Post-Bloom Orchid Care
Option 1: Discourage Repeat Blooming (Give Your Orchid a Rest)
If your orchid looks tired—perhaps with fewer leaves or unhealthy roots—forcing it to rebloom might weaken it further. This option is best for orchids that:
- Have fewer than three healthy leaves
- Show signs of poor root health
- Have recently rebloomed and seem stressed
How to Do It:
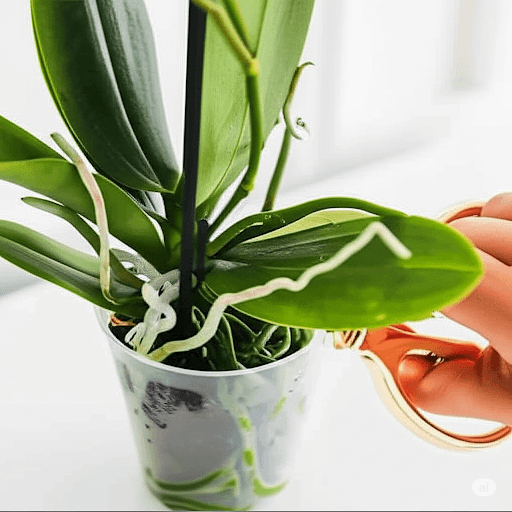
- Using clean scissors, cut the flower spike at the base, as close to the plant as possible.
- Remove any new budding stems that appear within the next couple of months.
This encourages the orchid to channel energy into root and leaf growth, preparing it for stronger flowering cycles in the future.
Best for: Unhealthy orchids or plants that need to recover
Option 2: Don’t Do Anything (Let Nature Take Over)
This method involves simply leaving the flower spike alone and letting the plant decide its next move. Many healthy orchids will naturally:
- Extend the existing spike
- Produce new blooms from the same stem
However, the new flowers are typically:
- Smaller than the original bloom
- Fewer in number, as the plant is still tired
If the spike remains green and firm, it may still be viable. But if it turns brown and dry, you’ll need to switch to Option 3 or 4.
Best for: Healthy orchids and growers who prefer low-intervention care
Option 3: Cut the Flower Spike Back to the Base
If the flower spike turns brown or the plant looks messy and unstructured, cutting it back to the base is a great idea. This helps reset the plant and redirect its energy.
How to Do It:
- Use a sterilized blade or scissors.
- Cut the spike close to the base, just above where it emerges from the leaves.
- Avoid cutting aerial roots or healthy leaves.
This encourages the orchid to grow new roots and leaves, preparing it for future blooming cycles. Although this method delays the next bloom, the eventual display will often be more impressive.
Best for: Orchids with brown, dried spikes or those needing a reset
Option 4: Cut Above a Node to Trigger Reblooming
If your plant is healthy and you’re eager to see flowers again quickly, try this popular technique.
What’s a Node?
A node is a small raised bump on the flower spike, found every few inches. New spikes or even baby orchids (called Keikis) can emerge from these points.
How to Do It:
- Identify a healthy green spike and locate a node (preferably the second or third one from the base).
- Use sterilized scissors to cut just above the node.
This method disrupts hormone flow, encouraging the plant to send out a secondary spike, often within a few weeks.
Best for: Healthy orchids ready to rebloom quickly
Is It Safe to Use Multiple Options?
Yes—if your plant has multiple stems. For example:
- Leave one spike alone (Option 2)
- Cut another above a node (Option 4)
- Remove a brown spike completely (Option 3)
This approach allows you to experiment while observing how your orchid responds.
Indoor Orchid Care Tips to Encourage Reblooming
Once you’ve selected a post-bloom option, follow these core care practices to maintain a healthy orchid:
1. Provide Bright, Indirect Light
Orchids love bright but indirect sunlight. A spot near an east-facing window is ideal.
Avoid: Direct sunlight, which can scorch leaves
2. Use Proper Potting Medium
Phalaenopsis orchids thrive in aerated mediums like:
- Bark chips
- Sphagnum moss
- Coconut husk
These mediums mimic their natural epiphytic environment and prevent root rot.
3. Master the Watering Schedule
Water when the roots turn silvery-gray, indicating dryness. Always:
- Use room temperature water
- Water thoroughly and let excess drain
- Avoid letting the plant sit in water
Myth Buster: Using ice cubes to water orchids is inefficient and can cause cold shock. Stick to regular watering methods.
4. Feed Regularly
Use a balanced orchid fertilizer (20-20-20) every 2–3 weeks during active growth.
5. Maintain Ideal Temperatures
Orchids prefer:
- Day: 20–25°C (68–77°F)
- Night: 15–18°C (59–65°F)
Cooler nighttime temperatures can even help trigger blooming.
What is a Keiki? (Baby Orchid Explained)
A Keiki (pronounced kay-kee) is a small baby orchid that grows from a node on the flower spike of a mature orchid, most commonly a Phalaenopsis. The word “Keiki” means “child” in Hawaiian, which perfectly describes this mini version of the parent plant.
It’s a natural form of orchid propagation and often happens when the parent plant is healthy and happy—or sometimes under stress.
How to Identify a Keiki:
- A small green shoot appears on a node (bump) of the old flower spike
- It starts to grow tiny leaves first
- Over time, white aerial roots begin to develop
- It looks like a miniature orchid attached to the flower stem
Keiki Care Tips:
- Let it Grow
Don’t rush to remove the Keiki. Allow it to develop at least 2–3 roots that are 2–3 inches long and 2+ leaves before separating. - Provide Bright Indirect Light
The parent plant and the Keiki both need bright, filtered light to thrive. Avoid harsh sunlight. - Keep Humidity High
Keikis love warmth and humidity. Try maintaining 50–70% humidity around the plant using a tray or humidifier. - Support It If Needed
As it grows, the Keiki may weigh down the flower spike. Use a stake and clip to gently support it. - Avoid Fertilizer Directly on the Keiki
Continue feeding the parent plant, but avoid putting concentrated fertilizer directly on the baby.
How to Remove and Pot a Keiki:
When your Keiki is ready (with strong roots and leaves):
- Use Sterile Scissors or a Blade
Cut the spike 1 inch above and below where the Keiki is attached. - Prepare a Small Pot
Use a well-draining orchid mix—like bark or sphagnum moss—in a 3–4 inch orchid pot with good airflow. - Plant Gently
Nestle the roots in the mix and press lightly to hold it in place. - Mist or Lightly Water
Keep the potting medium slightly moist, but not soggy. - Place in a Warm, Bright Spot
Maintain indirect sunlight and keep humidity high while the plant adjusts to its new home.
Bonus Tip:
Not every flower spike produces a Keiki—but when it happens, it’s a great opportunity to grow a brand-new orchid without buying another one!
Final Thoughts: Embrace the Orchid Cycle
Owning an orchid is more than enjoying its beautiful blooms. It’s about learning the rhythms of nature—patience, rest, and renewal.
By understanding the four post-bloom care options, you give your plant the chance to flourish again and again. Whether you let it rest or push for quick reblooming, your attention makes all the difference.
Take pride in every new spike and leaf. It’s a sign your indoor gardening skills are blooming too!
Ready to Upgrade Your Orchid Game?
Explore our collection of indoor plant care products, stylish pots, and fertilizers. Make every orchid in your home a reblooming success story.
Frequently Asked Questions
1.How long until my orchid blooms again?
With proper care, orchids can rebloom in 2 to 9 months. Cutting above a node usually produces faster results.
2. Why won’t my orchid rebloom?
Check for these issues:
- Lack of sunlight
- No fertilizer use
- Poor root conditions
- Stress from frequent reblooming
3. Can I use multiple methods on the same plant?
Yes, if the plant has multiple spikes. You can experiment—cut one back fully and cut above a node on another.
4. Do orchids have a bloom season?
While they often bloom more in spring or fall, indoor orchids can rebloom any time with the right environment.
5. Should I use ice cubes for watering?
Not recommended. Ice can shock the roots. It’s better to use room-temperature water and let it drain naturally.